Paper Flower Tutorial
1. Here are the main materials you will need; paper – I have used just plain red construction paper (of course you can use any colour!), dries clear glue, large 6 petal flower punch (or any six petal shape, sizzix, craft robo etc etc), glitter or stickles glitter, Fired brick distress ink pad, small piece of cut ’n dry foam and a cocktail stick (image 1)


2. Punch out 3 of the flower punch, make folds in them as in the picture to obtain the center (image 2)

3. In the first flower, just snip down the side of one of the petals to the middle, in the second flower punch cut away one petal and in the third flower cut away 2 of the petals (image 3)

4. At this stage using your cut ‘n dry foam with the fired brick ink pad, distress all the flower petals around the edges (image 4, 5)


5. Then using your dries clear glue, place some glue onto one of the petals of each of the three flowers and glue one petal over the other as in the picture - make sure you do this on the wrong side of the petals so that when they are glued down you do not cover the sides you have just distressed - (image 6,7,8)


6. Using your cocktail stick, curl all of the petals of each flower, of which there should be 3 (image 9,10,11)


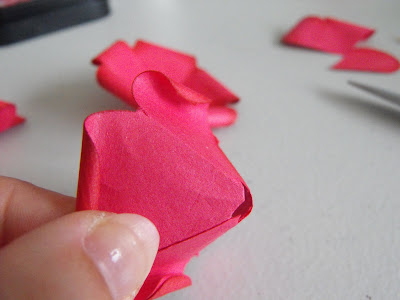
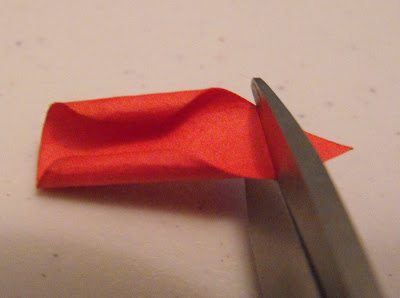
7. You will now need to snip pointy ends off the two smaller flowers – do not snip the biggest flower as this is your base flower (image 12,13,14)


8. Then take the largest flower and add some dries clear glue to the middle, place the next size down flower and place on top, again, place some dries clear glue to the middle of that and place the smaller flower on top and just hold them in place a few second for the glue to adhere. (image 15,16,17,18)


9. With the two petal (i.e the heart shaped piece) again with the cocktail stick curl the petal edges and then keep one curled but, straighten out the other (image 19,20)


Now bring the shape together to make a funnel shape, but not too tight (image 21)

and place some clear dries glue to adhere the edge in place (image 22,23) (if at this stage the straight side of the petal is too straight, using your cocktail stick just gently curl that petal)

and as before snip the pointy end off (image 24)

10. Finally for the single petal, using the cocktail stick, curl the petal at the sides this time (image 25,26)


and also snip the pointy end off (image 27)

and place it in the middle of your flower, securing it in place with some dries clear glue as before (image 28)

The rose is almost complete, now for the final touches.
11. Cut out two leaves either with a die cut, or a punch or even draw it by hand and cut it out, I have used my wizard flower set die in this instance, but any similar leaf shape will do (image 29)

with a bone folder give the leaf some shape (image 30)

decide where you want to place them add some dries clear glue and adhere them in place (image 31,32,33)


12. And finally take your stickles glitter and randomly place some around the petals or even add some dots of glossy accents to resemble raindrops (image 34,35)


YOUR FLOWER IS COMPLETE - now you have the basis of constructing you can adapt it to suit your projects, I have made smaller ones, different colour, different papers i.e patterened & tissue papers, distress some of the petal edges with a distress tool for a worn look it goes on and on......


Không có nhận xét nào:
Đăng nhận xét